The question of what a storm sewer is is no longer something mysterious and incomprehensible. The media constantly discusses topics on the correct operation of this type of sewer, especially when cities are flooded with rain. This system is specially laid for the removal of rain and melt water. And in private housing construction it is used everywhere today. Country developers invest a lot of money in storm water to protect their site from flooding.
The storm sewer system is simple. This is a network of channels, tunnels or pipes that divert rain and melt water from the foundation of the house and from the territory of the site. The conclusion is organized outside the site into natural reservoirs, ditches or ravines. Sometimes reservoirs are installed in the ground, where water is simply collected, and then pumped further. At the same time, the sewer network is a gravity system. Therefore, it is very important to correctly set the angle of inclination of pipes or channels from the house towards the outlet outside the territory. By the way, the angle of inclination varies between 3-7 degrees.

Storm system device
Types of storm sewers
There are two types of rainwater:

An example of an open and closed view storm sewer.
- Open type. These are dug ditches into which concrete or plastic trays are laid. From above, the tray system is closed with metal or plastic gratings. Before the advent of trays, dug ditches (trenches) were concreted by hand, or they were simply covered with rubble or gravel.
- Closed. This is an underground network of pipes. Today, ordinary sewer pipes made of plastic are used, which are interconnected by a socket method.

Scheme of a closed (underground) storm sewer
We must pay tribute to the fact that both varieties are today used in suburban areas in equal proportions. At the same time, storm sewer trays (concrete or plastic) are easier to install. The latter are easier, which means it’s easier to work with them, which is why they are so popular and in demand. We also recommend reading an article about a private house, how it works, read on our website.
Storm drain installation
The entire installation process must be divided into three main stages:
- Create a diagram and calculate the patency of the network.
- Carry out preparatory work.
- The installation itself is carried out directly.
Scheme and calculation
First of all, a schema is created. The storm system must be laid where rain and melt water is collected in large quantities. And these are the slopes of the roofs, under which the drain is installed. It is under the vertical pipe risers drainage system and it is necessary to mount the receiving elements of the stormwater. That is, these will be the starting points of the beginning of the scheme. It turns out that how many risers at the drain, so many sewer branches will have to be installed.
The opposite extreme point is a drainage well. It is installed in the lowest place of the suburban area. Therefore, this place must be found and designated in advance.

Storm sewer scheme.
Now we draw a diagram on paper:
- First, we mark the location of the well.
- Under the risers of the drain of the main house, we put the location of the storm water inlets.
- A straight line is drawn between the well and the receiver closest to it. This is the main storm sewer circuit.
- We combine the rest of the storm water inlets into a single circuit and bring it to the main branch.
On the site, in addition to the main house, there are auxiliary buildings: a garage, a bathhouse, a summer kitchen and others. They are also installed under their roofs, which means that stormwater will have to be carried out for these buildings. Everything is done in exactly the same way as with the system of the main house. Just connect their main circuit to the main sewer circuit.
The connection of all branches into a single network can be carried out according to two schemes:
- herringbone, when the docking of different branches of the sewer is made at angles to the main circuit;
- circular, when the main contour is drawn, and all other branches are connected to it through the combined rounded sections.
Usually the first option is used, as the simplest and least expensive.
Now, as for the calculation. There is a diagram, on it you can accurately calculate the number of storm water inlets, fittings, manholes and the total length of the required pipes.
Attention! Inspection wells are needed to control the operation of the storm drain, and, if necessary, to clean it. Install these devices every 50 m. On small summer cottages they are not installed.
Preparatory work
First of all, the scheme is transferred to the site. Just set the pegs, which are tied with twine or twine. Now you need to take shovels in your hands and dig trenches under the sewer pipe.
Since there are no serious requirements for storm water, except for a correctly set angle of inclination, the pipes are buried to a shallow depth. The removal of rain and melt water is carried out only at positive temperatures, so you do not need to pay attention to the fact that the piping will freeze. Accordingly, the volume earthworks will be small.

The most important thing in the process of digging trenches is to at least slightly hold the slope towards the well. Be sure to immediately dig a pit under the well. It can be assembled from iron concrete rings, brick, block or stone. But today, more and more people are using different sizes and forms plastic containers. This means that a pit must be dug to fit the parameters of the purchased reservoir.

The bottom of the trenches is covered with sand. Try to withstand the slope at least visually. In principle, at this preparatory stage can be considered completed.
Assembly process
The installation of storm sewers has approached its main stage - laying pipes or trays and assembling the network. This is the most important process on which the efficient and correct operation of the entire system depends. As for pipes, ordinary sewer products with a diameter of 100-110 mm are used for storm water. They are stacked by inserting into each other. When joining adjacent branches, the connection is made by fittings: bends, tees, crosses.

It is at this stage that it is necessary to ensure that the angle of inclination along the entire length of the contours is the same. Therefore, when laying each pipe, check it for slope using a level or goniometer. If the slope is large, then a layer of sand is poured under the lower edge of the pipe. If it is small, then, on the contrary, the poured layer is reduced.

When the entire network is assembled, they proceed to the installation of a sewer well. The main task, if a ready-made tank is purchased, is to set it up so that its inlet pipe becomes a continuation of the sewer pipe in one straight line. In the tap (knee) in this place - not the most the best choice. This is the first.
Secondly, it is important that the inlet pipe is flush with the supply pipe. Therefore, storm sewers are first assembled, meaning pipes, and then a plastic well is installed. If its inlet pipe turned out to be much lower than the sewer pipe, then the tank is pulled out and a sand bed is made under it. If it turned out to be higher, then the bottom of the pit is reduced by digging out part of the soil or sand cushion.
Installation of storm water inlets

Installing a storm water inlet for a private house
Despite the seeming simplicity of this installation operation, there are several rather serious nuances in it that affect the quality of the final result. Here is the installation sequence for this device:
- At the installation sites of storm water inlets, holes are dug 15 cm deeper than the height of the device, on the sides 30 cm more than the side of the device.
- A cement-sand mixture is poured to the bottom. They level it and ram it. The thickness of the bedding is 10 cm.
- A double-folded polyethylene film is placed inside the hole. Laying is done so that the polyethylene covers the walls of the recess. This is a waterproofing that will prevent the concrete solution from penetrating into the soil and pillow.
- The bottom is filled with concrete mortar 2-5 cm thick.
- Install a storm water inlet, set it according to the level.
- It is connected to a pipe with a two-way coupling or two bends. The last option is used only if sewage pipe located well below the installation level of the storm water inlet.
- The gap between the walls of the recess and the installed device is poured with concrete.
- As soon as the concrete "grabs", a siphon, a sand collector and a grate are installed inside the storm water inlet body.
Attention! The height of the storm water inlet is installed so that its protective grating is located on the same level with the coating near the foundation. It can be a blind area or a sidewalk: tiles, stone, asphalt, etc.
This is how a do-it-yourself storm drain is built from sewer pipes.
Installation of trays
As for the installation of storm sewer trays, purely schematically, this process is no different from the previous one. That is, a main circuit is created, to which secondary branches of the network are attached.

Here it is necessary to decide first of all the question of what material to choose a tray from.

And two purely constructive moments. Let's start with the fact that storm sewers must be 100% tight at the junction of the trays. Therefore, manufacturers today offer trays with tongue-and-groove connecting locks. This is additionally convenient in the sense that when connecting two elements, there is no need to check how tightly one tray fits into the other. That is, they inserted the spike of one into the groove of the other - and this is a guarantee of the tightness of the connection.
The second structural element is the factory slope. All this consists in the fact that the tray itself is a straight product. But its grooved part is made at an angle. That is, on one side the thickness of the bottom is large, on the opposite side it is thinner. Therefore, when a storm drain is constructed from such trays, the trenches for them do not need to be dug with a slope. The bottom is leveled along the horizon, the same is done with a sand cushion. The products themselves are also displayed horizontally, which is much easier than tilting. Products made of concrete or composite material are recommended to be installed on a concrete pad. Plastic on sand.
How to take care of your rain gutter
If it concerns the system closed type, then you just need to periodically clean the storm water inlet from debris and sand. Usually the underground part is littered very rarely. But if this happened, then the most effective option- hydrodynamic. This is the supply of a large amount of water under high pressure.

As for the tray system, the main thing is to periodically clean the grids that cover the trays. This can be done with an ordinary broom. After the end of leaf fall, it is recommended to clean the trays themselves. To do this, you will have to remove all the grates and get the garbage with a scoop.
Conclusion on the topic
Storm water in a private house is a necessary system. Don't skimp on it. Moreover, the cost of its construction is minimal. The installation technology itself is simple, so it’s easy to do it yourself. The main thing is to take into account the nuances of selection and installation indicated in this article. Even a slight deviation in the editing process can reduce the quality of the final result.
To become a good owner of a private suburban area is not only to build a mansion and other necessary buildings - a garage, utility, utility rooms. It will definitely require a lot of attention - installing fences and fences, gates, planting the necessary trees, creating recreation areas, laying out flower beds or a vegetable garden, building greenhouses and much more. And so that all this self-created splendor served as long as possible, you need to take care of another important component - sewage.
In this case, we are not talking about the familiar one, which, by the way, is always remembered by everyone. But they often forget about the other - they mean "stormwater". But do-it-yourself storm sewerage is a difficult task, but no less necessary. Forgetting about her, and even more so - deliberately ignoring it will be an unforgivable mistake.
There is no need to hope that the huge masses of water that enter the site after summer thunderstorms or during prolonged autumn rains, during the spring mass melting of snow, they will leave by themselves, "resolve". All this without storm water can result in flooded basements or cellars, damp floors on the first floors and in outbuildings, rapid “aging” of building foundations, cracking of socles and blind areas around them, erosion and complete destruction of the paved paths to the house and footpaths, swamping of the site, death of garden plantings, other serious troubles.
In a word, it is better to make a high-quality storm sewer once than to constantly deal with the consequences of "water invasions". Read, remember, learn!
What is a storm sewer for? Its main elements
The task of storm sewerage is simple and understandable - it is necessary to collect all rain or melt water on the territory of the serviced area in communications specially laid for this purpose, it is organized to redirect it for primary filtration, if necessary, after-treatment, and then collect it in storage tanks or dump it into existing city sewer collectors, into their own drainage collector with further output to filtration fields or with a drain into a natural reservoir.
It is simply impossible to talk about any single model of storm sewers. Its design can be either the simplest or complex, branched, equipped with modern water purification devices. It depends and from the size of the serviced area, and from, its features, and from intensity and volume of precipitation, and from degree of water pollution, and from other factors. Nevertheless, we can talk about the generality of the basic elements of storm water, which in one form or another are present in any of the created schemes.
1 - One of the most important components is a system for collecting rainwater from the roofs of a residential building and all additional outbuildings. Its task is to collect the entire volume of water in one channel (or in several organized streams) in order to then redirect it to stormwater communications.
It will not be considered in this publication - a separate article of our portal is devoted to it.
2 - Streams of water must fall, first of all, into storm water inlets . Two options are possible here - linear and point.
- with a linear scheme, the role of storm water inlets is played by trays (gutters) installed at ground level and taken from above with a grate. Typically, this approach provides for a slight artificial slope of the surface towards the tray. By the way, long trays do a good job of transferring the water flow towards the collector - and this is a possible savings on pipes and earthworks.

- with a point arrangement of water collectors, an “envelope type” slope is made to them. Typical installation locations for such receivers water - under vertical drain pipes coming from the roofs, near the entrances to the building - in the pits at the doors, near the water intake in the yard, etc. Storm water inlets are always connected to an underground storm sewer system.

As a rule, none of the schemes is applied in a “pure” form - usually a storm drain combines both linear and point installation principles in a common system.

3 - Devices for preliminary, "coarse" water filtration - this includes gratings, baskets, sand traps, settling tanks. The task is to prevent a large amount of debris from entering underground utilities in order to avoid their rapid clogging.
Very often, such devices are part of storm water inlets.
4 - system underground pipes providing water transfer from storm water inlets to collectors or a discharge point.
5 - even a not very extensive system of underground communications cannot do without wells - they allow regular control and preventive measures to be taken to avoid sewer blockages.
6 – possibly for owners of private suburban areas, on which storm sewers are created, this is not of such high importance, but still one cannot fail to mention the water purification system. For example, rainwater from city streets, highways, parking lots, industrial or food enterprises must undergo a mandatory post-treatment cycle, otherwise it is simply forbidden to dump them into city sewers. So, water goes through oil separation in special devices, fine cleaning in carbon filters and other steps necessary in specific conditions. By the way, this opens up opportunities for great savings - for example, in car washes, whose storm sewers are equipped with modern filtering and cleaning systems, “secondary” water becomes again quite applicable for washing cars.

Be that as it may, it is forbidden to dump storm drains into natural reservoirs in urban areas. Whether or not to install an after-treatment system in your personal household is up to the owner of the site, although it is possible that such requirements may be made by environmental supervision services (for example, opening a car repair shop, another mini-enterprise, etc.)
7 - Finally, the final destination of water transportation. This may be a storage tank, the water from which can be used for technical or agricultural goals (it will only be enough to install). If there is no such need, then water can be diverted through the collector to filtration fields or simply discharged into a natural reservoir or into a centralized sewer system.
Now, in order to be able to choose the right things to do for the created storm sewer, the main elements will be considered a little closer.
Trays and spot storm water inlets
Let's start from the very beginning, with rainwater collection points.
a) Trays
As already noted, in storm sewers, which are completely or fragmentarily organized according to a linear principle, trays are the main place to collect water. It would seem that nothing could be simpler, but meanwhile they also have a certain classification according to several parameters.

- If this stormwater element is on the surface, then it simply cannot but experience certain external mechanical loads. Depending on the specific installation location of the tray, you can choose one of the classes of permissible load:
| Tray load class | Mechanical load limit | Typical place of application |
|---|---|---|
| A15 | up to 1.5 t | The weakest trays are used only in pedestrian areas, on bicycle paths, in park areas, along the perimeter of private houses, etc. |
| B125 | up to 12.5 t | They will completely cope with the mass of a passenger car, therefore they are widely used in parking lots and car washes, in garage cooperatives. Probably the most the best solution and for stormwater drainage of a private house. |
| C250 | up to 25.0 t | Trays are used in road construction, gas stations, large garages, car service enterprises |
| D400 | up to 40.0 t | Designed for roads with high intensity of freight and passenger traffic, on the territory of industrial and motor transport enterprises |
| E600 | up to 60.0 t | Large logistics centers, including berths, railway junctions, etc. |
| F900 | up to 90.0 t | Special purpose objects with possible extreme loads, for example, airfields, military bases, etc. |
- The next tray selection parameter is its throughput. It can in no way be less than the calculated data for a particular site (the calculation system will be discussed below). The main indicator is the diameter of the hydraulic section (DN) - a value that must correspond to the pipes supplied to the trays.
- And, finally, the material for making the tray - there are also several options here:
— Concrete gutters are the most durable of all produced. Those of them, which belong to the E600 (or even F900) class, are completely universal and can be used everywhere.
Concrete trays can have a fixed gutter depth, but some are available with an inclined bottom surface, which takes into account the slope necessary for water to drain (about 5%). Trays can be rectangular, trapezoidal or rounded. Hydraulic section — — from DN100 to DN500 . The height of the tray walls varies depending on the throughput - from 90 to 760 mm. The usual form of release is troughs 1000 mm long with a locking part for a secure connection.
The main disadvantage of such trays is massiveness. Even with comparatively small gutters with a hydraulic cross-section DN 150 the mass of one section is already about 100 kg.
Reinforced concrete trays are usually completed with cast-iron gratings. Not for trays large diameter can also be supplied with stainless steel grills.
- Plastic trays are the most popular option for storm drains in areas where high loads are not expected. They are made from polyethylene or polypropylene. By class strength - this is from A to C, that is, for the conditions of private development - it is quite enough.

The hydraulic diameter of plastic trays is from DN70 and usually up to DN300. Standard length - 1000 mm. A convenient locking system allows not only to embed linear structures, but also to make branches to the side or attach gutters to pipes. Lattices can be in a set corrosion-proof or the same plastic.
Polymer parts are convenient due to their small mass - installation does not require much effort and lifting equipment.
— Polymer concrete trays are a relatively new type of product. For the production, a composite was used, which will come to the gutters of the dignity of both concrete and plastic. At the same time, they are much more durable and twice as light as concrete and stronger than polymer ones. Models with DN from 100 to 200 are an excellent solution for private construction.
—Polymer sand trays are practically eternal products obtained by fusing polymer raw materials with fine quartz sand, followed by casting and pressing. As a result, both the complete chemical inertness of the resulting material and its highest strength.
By the way, the technology is not particularly expensive, so the price of polymer sand products are quite acceptable. The mass of products is almost three times lower than that of concrete ones, therefore, the costs of transportation, loading and installation are also significantly reduced.

Usually polymer sand trays are produced in sizes from DN70 to DN150 with strength class C 250. The gutters are equipped with all necessary parts.
b) rainwater inlets
In stormwater, which are organized according to a point type, storm water inlets become the main catchment area. Typical installation locations:
 Typical example installations - under the edge of the drainpipe
 - Directly under the downspouts that collect rain or melt water from the roof of the building. Often the downpipe even enters the storm water inlet, and it becomes its continuation.
- At the edge of the roadway.
- In places where the slopes of the territory intersect (natural or artificially created).
- Entrance groups - bars, places for washing or cleaning shoes at entrance doors Houses.
In order not to dwell on the materials of their manufacture for a long time, it can be noted that they completely coincide with the material of the trays (with one exception - there are storm water inlets cast entirely from cast iron).

In individual construction, plastic or composite materials are most often used. elementyou. As a rule, they have a cubic shape with a length of each side of 300 or 400 mm. Adapters are provided on both sides and bottom for easy and quick tapping of standard diameter pipes.

In addition, this gives one more opportunity - if, according to the operational features of the sewage system at a given point, a high-capacity storm water inlet is required, then it is easy to install two or more sections vertically, thus achieving the desired result.
What else can be included in a standard plastic storm water inlet:
- Not a single storm water inlet can do without a grate. It's not just for not create problems with the movement of people or vehicles - the grate also plays the role of the first filtering line - it retains large fragments of debris.

It is clear that the grating must have the required strength - not lower than the storm water inlet itself.
- A lot of debris still penetrates through the large cells of the upper grate. In order to minimize its entry into the pipes, many models of storm water inlets are equipped with a special lattice basket inside. This is very convenient - as the basket becomes clogged, it will not be difficult to pull out the ore by the handle and clean it, and then reinstall it.
- In storm sewer pipes, there is nowhere to go, there will always be a process of organic decay with a putrid smell known to all. To prevent these “aromas” from poisoning the atmosphere around the water collection points, baffles are provided inside the storm water inlets. They will divide the chamber into several compartments, creating a siphon effect. Thus, the resulting water seal will not let through bad smell out.
 Rain inlet - ladder
 There are models storm water inlets with pits and gratings installed on them for cleaning shoe soles. Alternatively, you can purchase instead storm water inlets ready-made blocks - ladders, in the layout of which everything is provided - and a filter grate, and a siphon shutter, and a branch pipe (horizontal or vertical) for connecting a pipe.
Prices for various stormwater systems
rainwater inlets
Pipes for storm sewers
The purpose of the pipes in the storm sewer system is so obvious that it is not worth dwelling on it. It is better to consider in more detail the requirements for them and the optimal models for selection.
- Since water always moves in storm drains under the influence of gravitational forces, without forced pumping, and they themselves are always buried, there are simply no special requirements for withstanding pressure load and thermal stability. Of course, provided that the strength margin is sufficient to withstand the external pressure of the soil layer, poured on them from above.
- High temperatures in such conditions cannot be by definition. At correct installation there should be no stagnation of water in the system, that is, frost should not be afraid either. The main thing is that the material of manufacture is not afraid of negative temperatures.
- But the chemical impact on the pipe walls, both from the inside, from passing water, and from the outside - from the soil, can be very aggressive. Therefore, the material is not suitable for everyone, but only with excellent inertness to active chemicals and not subject to corrosion.
- The water in the storm drain is far from clean, therefore the hydraulic resistance of the pipe walls should be minimal. There must be smooth inner walls so that no prerequisites for the formation of blockages are created in the cavity.
- And finally, the dimensions of the pipes.
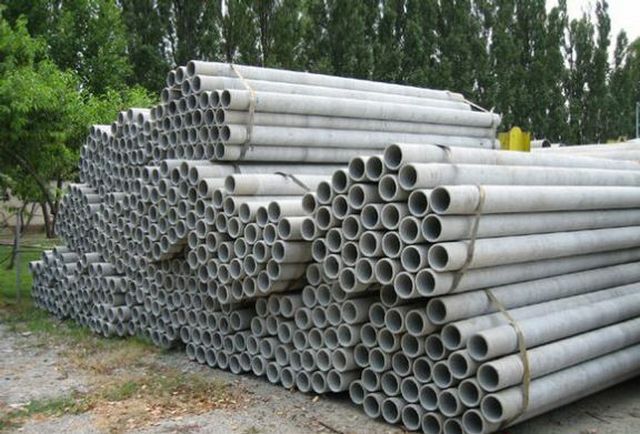
- the diameter, and hence the throughput, must fully comply with the design parameters of the storm sewer. As a rule, even in very small stormwater pipes, pipes with a diameter of at least 100 ÷ 110 mm are used.
- length of pipes: the more - the better. Any joint is always a vulnerable spot, either in terms of leakage or clogging. So, the fewer of them - the better for stormwater, and the easier it is to install.
- Asbestos concrete pipes, although they are considered quite reliable, durable, but their popularity is falling, and their use is increasingly being abandoned. This is due to several reasons.
They are fragile and can be damaged in transit or during installation. They are inconvenient to assemble - because of their severity and the need for special sealing of the joints. very aggressive soil, the material will eventually begin to decompose, become loose. Yes, and from the point of view of ecology, asbestos is still not the best way. In some European countries, by the way, it is not used at all in residential construction for this reason.
- PVC pipes, the same ones that are widely used for conventional sewage. They have a diameter of 110 or 160 mm, and those that are approved for outdoor use have a characteristic bright orange color.
Such pipes are connected very easily, as there is a special socket for this with an installed seal - a rubber cuff. Their surface strength is quite enough to withstand the pressure of several meters of soil. The cavity of the pipe is smooth, that is, the resistance to the flow of water is minimal.
 The main disadvantage of PVC pipes is the lack of flexibility.
 And yet they are not ideal. The main disadvantage of PVC pipes is their limited length (maximum - 3 meters) and a complete lack of elasticity. Even a slight change in direction will require the use of special elements - bends, and this is an increasing number of joints and a serious rise in the cost of the entire system being created.
- The optimal solution to the problem is the purchase of plastic pipes with a multilayer structure and a corrugated frame. The special ring stiffness allows such pipelines to withstand very significant loads, while remaining flexible.
 Multilayer corrugated pipes - the best solution
 Plastic can be used differently. Pipes are made from one polymer. such as polypropylene. But more often, such a scheme is used - the inner surface, which provides an unhindered flow of water, is low-pressure polyethylene, and the reinforcing top layer is made using polypropylene.
The flexibility of the pipes makes it possible to plan a route with curved sections - no additional elements it won't require. Moreover, pipes with a diameter of up to 200 mm can be purchased in a bay with a total length of up to 40 - 50 meters. Thus, it is fashionable to carry out the installation of long sections, for example, between revision wells, in one fragment, without additional joints.

The conjugation of such pipes can be carried out in different ways - with sockets and sealing rings, with transitional couplings - welding, heat-shrinkable, coupling, etc. In any case, installation is not particularly difficult if there is the right tools and fixtures.
- Worthy of mention, although it is practically not used in storm drains of private houses, glass plastic pipes. Their sphere of use is large highways and collectors¸ with a diameter of about 500 mm or more.

Their convenience is in lightness and at the same time - the highest strength, complete environmental cleanliness, durability. The disadvantages that limit their widespread use are considerable difficulties in the technology of their connection and a rather high price.
Prices for fiberglass pipes
Water filtration and purification devices
The next important elements of storm water are fixtures and installations for treating waste water. Are they really necessary?
- Water on its way to storm water inlets or gutters captures a considerable amount of grains of sand, small particles of soil and organic matter. If their free penetration into the underground pipe system is not prevented, then it will quickly silt up, overgrow with sand, and cease to cope with its task. To prevent this from happening, storm flows must pass through sand traps and mesh mechanical filters.
- Rain or melt water necessarily carries with it waste or residues of oil products that are on the ground or suspended in the atmosphere, components of automobile exhausts and industrial emissions, etc. One of the tasks of cleaning is the removal of such contaminants.
- Many surprises can be expected from chemical composition water - it is strongly affected by agricultural chemicals, reagents on the roads, the same industrial emissions. All this can pose a very serious threat to environment. This means that water will also require chemical treatment.
This complex of problems is solved in different ways.
Sand traps(sand traps)
These are very simple devices., which, at the same time, are capable, with their proper installation, of retaining at least 85 ÷ 90% of insoluble inclusions in rain or melt water. Sand traps are an indispensable element of any storm drain, without exception, regardless of its type, branching and the required degree of water purification at the outlet. Without them, the communication part of the sewer will quickly become overgrown with sand and dirt, and will require expensive flushing.

Operating principle sand traps- extremely simple. This is always a three-dimensional chamber, designed in such a way that water entering it sharply reduces the flow rate. This makes it possible for solid suspensions to simply settle to the bottom of the chamber under the action of gravity. Purified water continues to move further through the outlet.

Typical places for their installation are the transition points of the tray storm water inlets into underground utilities, immediately after the point receivers(for example, behind the input pallets). In this case, they are usually equipped with a basket in which deposits accumulate - to facilitate regular cleaning.
The form of execution is most often a vertical chamber, although there are also horizontal multi-chamber traps. In addition, the sand trap chamber is most often the first in the direction of the liquid in other filtration and purification installations, for example, in oil and petrol separators or filters.

According to the material of manufacture, various options - sand traps there are plastic, concrete, polymer concrete. Usually they are purchased in a single kit with other elements of the system.
Oil separators
In most cases, such equipment in the practice of private construction will not be needed. However, if the owner of the site intends to organize on his territory, for example, a car repair shop, a mini-workshop, a car wash, etc., then he may not receive permission for this until he equips the storm sewer accordingly. AND oil and petrol separator become a mandatory element. Therefore, in a nutshell - about such devices:
Most often, this is a container located underground, divided by partitions into several compartments. The first is almost always used as another volumetric sand catcher. The very process of separating oil products from water takes place in a compartment with coalescent modules installed in it. These are corrugated plates made of special polyvinyl chloride glued into cassettes. Here, a specific property of PVC is applied - wettability its water, i.e. hydrophobicity. But oil products, on the contrary, are perfectly “attracted” to this polymer surface.

The remains of fuel and oils are contained in water in the form of insoluble microsuspensions - suspensions. For years, the flow passes through the modules (they are made corrugated to increase the contact area), then water penetrates further freely, but microscopic drops of oil products stick to PVC, gradually combining with each other and, accordingly, growing larger. The flow of liquid through the plates always causes microvibrations, which contribute to the detachment of drops of fuel and lubricants from the PVC surface. Since the drops have reached large sizes, gravitational forces begin to act on them. Petroleum products are lighter than water and float to the top, forming a dense layer of waste on the surface, which is removed as needed (many oil separators are equipped with built-in waste filling control systems).
In the common tank of the fuel oil separator in the chamber next in the direction of the water, a fine filter can be installed immediately. mechanical cleaning. Further, the purified water enters the collector or to the additional treatment plant, if necessary.

Modern devices for storm water purification from oil products can also be small in size, and sometimes they are produced in such a design that they can even be placed in a visit, for example, in the basement. The figure shows such a compact fuel oil separator made of high density polyethylene (PEND), which can be installed indoors or, for example, in a manhole.
Additional filtration and purification devices
This includes, first of all, all those lattices and baskets that are found on the path of water, starting from the very surface. If the water requires more serious mechanical purification, then flotation plants can be included in the system - in these chambers, storm drains are aerated with a water-air dispersion, the bubbles of which entrain even the smallest insoluble inclusions.
If chemical treatment of storm drains is also required, for example, for the recycling of collected water, then sorption filters are installed. Water, passing through the backfill of activated carbon, shungite, zeolite or other non-fillers, is filtered at a fine level, and then enters the storage collector. After such filters, a special well is usually arranged for taking chemical water samples.
Video: storm sewer with water treatment systems
Wells and collectors
Finally, essential elements any storm sewer are wells and sewers.
Wells
No underground pipe system can do without wells, and storm sewers are no exception in this regard. These items are required to be installed:

- At those points where two or more paved underground streams of water come together.
- Where, according to the conditions of the terrain, there is a need to drastically change the angle of the pipes or the height of their occurrence underground.
- At the point where the direction of the laid underground pipeline changes sharply (at the top of the formed corner).
- If necessary, switch to pipes of larger diameter.
- On straight long sections of the route - at certain intervals.
If earlier wells had to be laid out of brick, concreted or, use heavy reinforced concrete rings, today there are big choice these products made of various types of plastics or fiberglass.

Wells usually have a vertical cylindrical shape, they can be solid or collapsible. They always have a sealed bottom and a hole on top, taken by a lid or hatch. The housing must have inlet and outlet pipes for inserting pipes.
If the well is used as a drop well, then the entrance to it is always located lower than the exit. Typical example applications– when, with long and branched systems, it is necessary to avoid a strong penetration of pipes into the ground, or when it is necessary to bypass an underground obstacle.
By the way, all wells very often play the role of additional and very effective sand traps. Cleaning it up is much easier than flushing clogged pipes.
Several vertically installed and hermetically connected storm water inlets can also be used as revision wells - this is inherent in their operational capabilities.
A special type of well, if necessary, is located immediately after leaving the treatment plant - samples of purified water are taken here before it enters the collector.
collectors
All rain or melt water collected from the site must be collected in one place. (or in one thread) for organization or its accumulation for economic use, or for discharge into a drainage field, into a natural reservoir or into a centralized sewer system. In any case, a collector is needed, which is usually a large-diameter pipe, plastic or reinforced concrete - all supply pipelines from all sections of the storm sewer cut into it. Through it, the collected rainwater is sent to the place of treatment (if necessary), and then to the place of discharge or accumulation.

There are also special underground plastic containers, which play the role of a collector - here water is collected and then discharged to drainage fields or to an open drain.
Often, underground reservoirs have a multi-chamber layout, and the water here undergoes additional settling and post-treatment, according to the principle

Another collector option - in its role you can use a polymer sealed well of increased capacity. All unnecessary outlet pipes on it are muffled, and it turns into a storage tank, from where water can be pumped out submersible for household or agrotechnical needs.
Prices on different kinds septic tanks for sewers
How to plan and calculate storm sewers
Planning and designing a storm sewer is a very difficult question. If storm water is necessary to open a business enterprise, then you should not even undertake independent calculations. Such a task for forces only to special organizations that must be government certified. They will design the storm sewer system taking into account a wide variety of information:
- Topographic features of the site, the presence of natural slopes, reservoirs, etc.
- Climatic features of the region.
- Approximate plans for the general building and landscaping.
- Geological surveys - features of soils in the territory.
- Technical conditions for connection to the central collector system or sanitary standards for the discharge of storm water into the soil or into natural water bodies.
- Be sure to take into account the desires of the owners, for example, for the construction of storage tanks for collected water.
The drafted project is subject to mandatory approval by regulatory organizations (Tekhnadzor, SES, ecology, Vodokanal), and only after full approval it will be possible to start construction. Typically, such survey work is carried out at the stage general planning site development, taking into account the location of all types of sewers - waste, storm and drainage.
In the event that such a sewer does not require coordination, and the owner of the site is going to build a storm drain at his own peril and risk, without the involvement of specialists, he should still adhere to certain recommendations. All of them are based on the requirements of SNiP -2.04.03-85, but are presented in a somewhat simplified form, which should be sufficient for independent planning.
Performance of the planned stormwater
In order for the system to fully cope with its tasks, its elements must be able to pass the required amount of water through itself (of course, with a certain margin). First of all, this concerns pipes - their hydraulic section should ensure the removal of the average amount of precipitation. How to calculate it? - for this, you can apply a simplified calculation formula:
QSat= q20 × F× ϒ
The letters are:
QSat- the calculated volume of water collected from a certain area
q20 - a tabular value expressing the coefficient of precipitation intensity in a given region. It is calculated by processing the data of long-term observations. The specific value is always known to employees, local meteorological services, architects, but it is also easy to find out from the attached diagram. The unit of measure is liters per second per hectare.

F- the area for which the amount of precipitation falling on it is calculated. If the area of a pitched roof is measured, then it is taken in a horizontal projection, as in the plan. If water from several areas enters one storm water inlet, then their area is summed up. The resulting value must be converted into hectares.
ϒ is a coefficient that gives a correction for the absorbency of the coating. Several values that are important for the owners of suburban areas are shown in the table:
So, first, a calculation is made for each point of the storm water inlet (line of trays). Based on the volume obtained, according to the table below, the required (minimum) diameter of the pipe that drains water from this section to the well is determined. If several flows converge in the well, then, accordingly, the calculation is further carried out from the total volume of water removed - and so on.
As a rule, for a small country mansion or plot, pipes with a diameter of 110 to 150 are enough. For a collector - in the region of 200 mm.
Created pipe slope
Since storm sewers never involve forced pumping of water, the pipes must be sloped in advance, which will be sufficient for the independent flow of liquid from collection points to a place of discharge or accumulation. This value depends mainly on the hydraulic section of the pipe or gutter.
The table below answers two questions at once:
- According to the calculated value of the total volume of collected water QSat- the required pipe diameter is determined in the first three columns.
- In the right column, you can immediately see the required slope angle of the pipe or tray.
| Hydraulic section of pipes or trays | DN 110 | DN 150 | DN 200 | Slope (%) |
|---|---|---|---|---|
| The volume of collected water (Qsb) | 3.9 | 12.2 | 29.8 | 0.3 |
| -"- | 5 | 15.75 | 38.5 | 0,3 - 0,5 |
| -"- | 7 | 22.3 | 54.5 | 0,5 - 1,0 |
| -"- | 8.7 | 27.3 | 66.7 | 1,0 - 1,5 |
| -"- | 10 | 31.5 | 77 | 1,5 - 2,0 |
To make it easier to understand - 1% slope will correspond to a 10 mm difference in height on a straight section 1 meter long.
Calculation is good, but still practice shows that for normal operation of storm sewers, a slope of 20 mm / 1 is usually made pog. m - for pipes and trays DN110, about 10 mm - for DN150 and about 7 mm - for DN collectors 200.
There are some retreats. After inserting the pipe into the storm water inlet, the slope is usually made larger - so that there is no stagnation in this place, so that the water goes as quickly as possible into the underground utility system. Conversely, before entering the sand traps, the slope can be reduced so that the water enters the expanded tank in a calmer state - this will make it easier for solid particles to settle to the bottom.
Pipe depth
In theory, water should not stagnate in storm pipes, and therefore one should not be afraid of freezing. Apparently, therefore, there are no exact rules on the issue of deepening pipes into the ground. There are only recommendations that are probably worth using:
- Pipes with a diameter up to DN500 have an upper edge below the freezing point by at least 300 mm.
- With diameters of DN500 and more, this interval increases to 500 mm.

The general recommendation is the minimum depth of occurrence - 700 mm. It happens that the features of the system do not allow pipes to be located so deep. This means that you will have to think over the issue of thermal insulation (for example, polystyrene half-cylinders) and protection against accidental mechanical damage.
Where are the wells located?
The location of the wells has already been mentioned above, when their purpose was considered. In order not to repeat - only about their location on straight sections:
A few words about the sizes of wells. If a storm drain is created in a private house, then the pipes usually do not exceed 200 mm, and the diameter of the wells is 1000 mm. With pipes DN110 and DN150, wells with a diameter of 700 mm can be used, but only if their depth is not more than 1000 mm. And if you need a deep well, more than 3000 mm, then its minimum diameter increases - already up to 1500 mm.
Having dealt with the basic principles of storm sewer planning, you can proceed to draw up your own project.
- First of all, it is necessary to divide the territory into water collection areas, determine their area (for the roof - this is done in a horizontal projection, that is, without taking into account the slope, as for a flat one).
Calculating area is easy!
For those who experience certain difficulties with geometry, a lifesaver has been prepared. Follow the link to a special portal article dedicated to questions - a variety of examples are considered there, from the simplest to quite complex, convenient calculators are posted.
- The possibility of placing common storm water inlets for adjacent collection sites is determined. The collection principle is selected - point, linear or combined.
- The volume of collected water (in liters per second) is calculated according to the above formula for each collection area and then in total - for each storm water inlet.
- According to the tables, the required cross-section of pipes and their slope are determined.
- Wells are “arranged”, and for each of them the volume of storm collection is summed up - to correctly determine the cross section and slope of the pipes coming out of them - further, to the next wells or directly to the collector.
- There may be a need for a certain "cascade" of wells with a gradual increase in the number of serviced collection points. The approximate required volume of each well is immediately estimated.
- It is planned to install sand traps and, if necessary, other treatment systems.
- Ultimately, all traces must converge to a collector of a certain capacity. Further, depending on the specific conditions, the output to the fields of drainage, discharge or accumulation for the subsequent use of water for irrigation or other household needs.
In order not to be mistaken in the calculations, it seems appropriate to compile a table in which all catchment areas with their sizes and characteristics and the “hierarchy” of storm water inlets, wells and collectors will be indicated. The execution may, of course, be different, but as an option - the table below as an example:
| collection area | Area (m²) and volume of water collected | Inlet No., total collection volume and outlet pipe diameter | Well No., total collection volume and outlet pipe diameter | Well No. total collection volume and outlet pipe diameter | Collector, total collection volume |
|---|---|---|---|---|---|
| Southern slope of the roof of the house, metal tile | 40 m², 0.36 l/s | №1d, 0.63 l/s, DN110 | №1k, 1.15 l/s, DN110 | №3k, 1.66 l/s, DN110 | 3.02 l/s |
| Courtyard area, asphalt. | 32 m², 0.27 l/s |
||||
| Northern roof slope, metal tile | 48 m², 0.43 l/s | №2d, 0.52 l/s, DN110 |
|||
| Playground - lawn on the back of the house, soil | 28 m², 0.09 l/s |
||||
| Gazebo in the recreation area, metal tile | 15 m², 0.14 l/s | №3d, 0.51 l/s, DN110 | №2k, 0.51 l/s, DN110 |
||
| Playground in the recreation area, concrete | 30 m², 0.23 l/s |
||||
| Lawn in the recreation area, ground | 45 m², 0.14 l/s |
||||
| Platform at the entrance gate, concrete | 16 m², 0.12 l/s | №4d, 0.26 l/s, DN110 | №4k, 0.6 l/s, DN110 | №7k, 1.36 l/s, DN110 |
|
| Parking lot, rammed gravel | 38 m², 0.14 l/s |
||||
| Garage roof, shed, metal tile | 28 m², 0.25 l/s | №5d, 0.34 l/s, DN110 |
|||
| Garage area, concrete | 12 m², 0.09 l/s |
||||
| Roof of the utility block (shed + boiler room), metal tile | 17 m², 0.15 l/s | №6d, 0.24 l/s, DN110 | №5k, 0.24 l/s, DN110 |
||
| Utility area, concrete | 12 m², 0.09 l/s |
||||
| Garden area, soil | 185 m², 0.52 l/s | №7d, 0.52 l/s, DN110 | №6k, 0.52 l/s, DN110 |
||
| And so on, for all areas where a storm sewer is being created. | |||||
And in order to simplify the task for the reader as much as possible, so that he does not have to carry out calculations manually, especially since the conversion of the area into hectares is required, a convenient calculator is placed below.
Any private house exposed to precipitation. Sooner or later, any homeowner begins to think about storm sewers on their site. In fact, it effectively collects and also removes precipitation from the site. Many have confidence that this system is a drain from the roof. In fact, this is a complex mechanism that includes many elements. Let's talk about how to make a storm drain on your site.
Principles of wastewater disposal
It is best to get started with studying the main points of water disposal. The whole system should be directed to the main principle - drains are collected from the roof into a single stream, and then redirected to the collector. So all the main elements are collected in a common highway, which carries out a spillway.
In general, the procedure for draining rainwater will look like this:
- Water from the roof flows into the gutters of the roof drain;
- Drains enter the storm water inlet, are sent to the collector.
Useful advice. If there is no centralized sewage system, then the nearest ditch, reservoir or suitable well can play the role of a collector.
If we mention the drainage system, then it also occupies a significant place. It settles down where the largest amount of water is collected.
How to design and calculate a storm drain
In order to do all the work with your own hands, but not to spend extra money, you need to carry out all the calculations in advance. Otherwise, you can get the following trouble:
- Do not calculate all the nuances. The system will not cope with the required amount of work;
- Do everything with a margin. Extra money will be spent.
The most accurate calculation will be obtained if the following data are available:
- Precipitation (volume), which is characteristic of the area. They can be found if you study the SNiP.
- When removal of melt water is required, then information about the level of snow cover. Here, the frequency of rains will be needed.
- Wastewater collection area.
- Soil parameters on the site.
- The location of the communications available in the land.
When you have all the data, you will be able to perform all calculations on the number of drains to be diverted. The following formula is used in the calculation:
 For calculations, a correction factor is required. It will be different for different types surfaces:
 According to the results of the calculation, it is necessary to select the required pipe diameter. In the search, you need to use the current SNiP table.
The design must also take into account the manner in which fluid is transported to the reservoir. If there is such a situation that the slope of the storm sewer is insufficient for gravity flow, then it will be necessary to use the forced method using pumps.
Pay attention! Design must be carried out both at the external roof system and at elements underground.
System elements
Since rainwater drainage is necessary in order to collect and remove precipitation, the main structural elements will be pipes, trays, storm water inlets. Functionality depends on the correct choice, as well as the installation of components. Next, consider the structural elements of the stormwater.
receiving elements
rainwater inlets. Required to collect liquid from roofs, concrete surfaces, etc. Structurally, it is a container with a tap to a common sewer line. The material of manufacture is different, but most often they are polyethylene or polypropylene.

A prerequisite is the presence of filters that protect against clogging with debris. They are a kind of basket that can be pulled out for cleaning. There are also devices equipped with siphons to delay unpleasant odors.
Door trays. Analogue of the previous element. However, they are mounted near the entrance. It has a protective grille at the top, and a tap for connection to the pipeline at the bottom. Using such pallets solves 2 problems:
- Collects, removes liquid at the entrance to the building;
- Cleans the shoes of people entering the building. There is a special grille, which, among other things, is a decorative element.

Pipes and trays. Components through which fluid moves. direct wastewater from the storm water inlets to the collector.
Wells. They provide intermediate collection of rainwater, as well as stable operation of stormwater drainage.
Storm drain protection devices
Sand traps. They are a mandatory component. The main task is to hold sand or soil. They protect pipes from clogging and allow the entire system to work optimally.

The principle of operation is as follows: water enters the sand trap. The flow rate in the device decreases because its size is larger than drain pipe. Soil particles settle to the bottom, and the liquid moves further along the outgoing pipe.
In the same way as storm water inlets should have filter baskets to remove dirt.
Oil separators and oil separators. Devices that are mandatory for installation at industrial facilities. Especially important point will be where there is a combination of storm sewers with the removal of waste liquid, for example, at car washes.

Filters. Rainwater collection and removal systems are not able to function without various kinds of filters. They can clean from mechanical impurities, carry out deep cleaning to the necessary sanitary requirements. Filtration devices are as follows:
- Mechanical. Simple in design, but very effective. They carry out the main purification - from suspended particles. The first stage of cleaning is carried out by gratings on gutters, storm water inlets. The second stage is carried out in filter baskets that trap small debris. Provide long service life with high performance.
- Sorption. Since the presence of harmful chemicals is found in rain or melt water, it becomes necessary to clean them up. Such purification occurs with the help of sorption filter elements. Such devices allow water to pass through itself, purifying it from harmful substances. Activated carbon, shungite, special substances are used as sorbents.
Water Collection Methods
Based on the options for collecting water and design, storm sewers can be divided into 2 types - point and linear.
Point system
It has storm water inlets installed under the gutters from the roof. Each device has its own line, which is part of a single trunk. As mentioned earlier, they have protective grilles, as well as sand traps.

Linear system
With this design, the storm drain consists of a network of trays and pipelines, either in the ground or openly laid. Open trays are also equipped with sand traps and protective gratings. The difference with the point will be that the linear one is able to absorb liquid both from the roof and from the entire site. For significant perimeters, it is necessary to apply this particular model.

Thus, before starting work, you need to decide on the method of collecting water, since at the initial stage preparatory work will be required.
At what depth canals be laid
It is necessary to choose the level of the bookmark taking into account the conditions of your site. So, for example, for small pipes, the depth is 30 cm. When the pipelines are already of medium size, it is necessary to deepen up to 50 cm. For large dimensions, of course, a different level of deepening will be required - up to 70 cm.
Pay attention! If there is a drainage system, storm sewers should be laid above it.
If there is no desire to sink too much into the ground, then you can reduce the depth of the bookmark. So, for example, the collector does not have to be mounted at a level greater than the depth of soil freezing. In this case, it is not necessary to deepen the channels. To prevent freezing of the collector, it should be insulated.
You can reduce the depth of the trench, but you don’t need to get too carried away. So, the slope of the storm sewer must be sufficient for an independent stack of liquid. Based on this, the collector in any case is located below the level of the storm water inlet. Just for this moment, the development of the project will come in handy. It will allow you to calculate the required slope in advance.
What slope is needed
The slope of the storm drain is regulated by the state standard. Based on this, the level will be as follows:
- Pipes of 150 mm - 8 millimeters per 1 meter of the route;
- Pipe 200 mm - 7 millimeters per 1 meter of the track.

True, you can take into account the nuances of the site and slightly change these values.
Pay attention! The storm water inlet must have a slope of 2 mm. This is due to the fact that if the slope is too small, the stormwater may not be able to cope with the entire amount of work.
The sand trap must have an even lower level of inclination, because. the principle of operation must be observed so that solid elements have time to fit on the bottom.
Mounting process
The initial stage is the installation of gutters on the roof and bringing them down to the storm water inlet. Next, operations begin on the site.
All installation begins with the installation of storm water inlets. They must be installed directly under the roof drainpipes. Each receiving device must be connected to a single line. Gutters with the help of knees are combined with receivers.
The next step is to prepare the trenches. Pipes must be laid on a bed of sand, the thickness of which is at least 100 mm. It has already been said above that the necessary bias is required, which must be constantly monitored.

To reduce the amount of earthmoving, you can place a storm and drainage pipeline in one prepared trench. But you can't combine them. The drainage line must be placed below, and on top of it is already a storm.
If we summarize all the operations, we can say that all pipelines are brought into a single line that goes to the collector.
As for the collector, it is important to note that it must be equipped with elements for controlling the water level and cleaning it from pollution.
When all pipelines are connected and laid, then all trenches are covered with gratings.
Naturally, after installation, it is necessary to conduct a performance check. The storm drain is checked as follows - a bucket of water is poured into all storm water inlets, the stack process is observed. You should also look for leaks. If present, remove them immediately. If everything works well, then cover the gratings with cellophane, fill the trench with soil.
Combination of storm and drainage systems
Earlier it was said that it is impossible to combine storm and drainage systems into one highway. However, we offer the main points for their proper arrangement.
- Combination is not allowed.
- Drainage is located at a depth greater than the level of soil freezing.
- For drainage, it is necessary to make a deeper trench, which, among other things, must be covered with rubble. The use of crushed stone is explained by the fact that this makes it possible to exclude pressure on the groundwater pipe and thereby protect the pipe from destruction.
- Installation of drainage is also carried out in compliance with the slope.
So that there is no flood on the site after each rain, so that the foundation does not get wet and does not collapse, it is necessary to ensure the removal of precipitation. For this, rainwater is needed. We can see it in cities - this is a system of water intake devices and canals. Storm sewer in a private house is smaller, but its essence is the same. This is not to say that it is easy to do, but you can do it yourself, especially if you have already done something on the site with your own hands.
What is a private house storm sewer system and what is it like
In regions with a high amount of precipitation, it is necessary to divert rain and melt water somewhere. If this is not done, the paths are gradually destroyed, the earth in the yard becomes limp, and then dries out for a long time. If you still don’t make a blind area around the house, rain water wash and gradually destroy the foundation. In general, storm sewers in a private house are the key to the longevity of your home, order and tidy appearance on your site. This kind engineering systems It is also called a storm sewer or rain sewer.
The composition of the system is as follows:

Where to put water
Most of the questions arise with what to do with the rapidly pouring precipitation. Firstly, a storm sewer in a private house can become a supplier of water for irrigation. To do this, all the pipes of the system are reduced to a large container or several containers, and from there, using a pump, they can be pumped into the irrigation system.

Secondly, if there is nothing to water or nowhere to put such a volume of liquid, it is possible to divert storm water into a centralized sewer, a gutter located near a reservoir. If these opportunities cannot be realized, they arrange a system for discharging water into the ground. These are perforated plastic pipes buried below ground level.
Types and their features
Storm sewers in a private house can be of three types:

In each case, you have to design your own scheme - there is no single recipe. Each has its own site with its features: the absorbency of the soil, relief, building, layout.
What exactly needs to be done is to divert water away from the house. This can be done as in the photo above - by installing gutters in the path and draining water onto the lawn. But this is just one of many options. The second place where it is desirable to divert water is a vast paved area. As a rule, large puddles form here, which are difficult to deal with. You can solve the problem by making one or more water collection points - put point storm water inlets and divert water according to one of the recipes.
Combined or separate
Often in a private house it is necessary to do three drainage systems at once:
- drainage;
- storm.
Often they run parallel or are located close to each other. Naturally, there is a desire to save money and combine storm water with some other. In particular, to use an existing well. It must be said right away that it is better not to do this. Why? During a rainstorm, water comes at a very high speed. On average - from 10 cubic meters per hour (maybe more). At this rate of water flow, the well fills up very quickly. Sometimes it overflows.
If the discharge goes into the sewer well, water begins to flow into the sewer pipes. It will not rise above the ground level, but you will not be able to lower anything - everything will be in the plumbing. After the water level drops, debris remains inside. It interferes with the normal operation of the sewer, you have to clean it. Not the most pleasant thing to do.

Simultaneous laying of all systems on the site - the main thing is not to get confused
If the discharge goes to a drainage well, the situation is even worse. During a rainstorm, water enters the system under high pressure. It fills the pipes, then pours out under the foundation, washing it away. You can imagine the consequences. There are still not so obvious things. For example, silting of drainage pipes. It is impossible to clean them, you have to change them. And this is a big expense and a lot of work.
So from all that has been said, we can conclude. The first is that storm sewers in a private house should have their own well. The second - it is desirable that it be large. This is if you are not lucky to have a pond, lake or river nearby.
Stormwater components and their types
All elements of storm sewers in a private house must be connected to the system. Here's what it might be:
- Well. It must be large. How much depends on the amount of rainfall, the size of the roof and the area from which water is collected. Most often it is made of concrete rings. It is distinguished from the water one only by the need to make the bottom. For this, you can put the bottom ring down (there are factory ones), or you can fill the stove yourself. Another option is plastic wells for rainwater drainage. They are buried to the required depth, anchored (chained) to flooded concrete pads - so as not to “float”. The solution is good because there is no need to worry about the tightness of the seams - such vessels are completely sealed.

- A hatch over a storm well. It is best to take a ring and a separate hatch (plastic, rubber or metal - your choice). In this case, you can dig in the rings so that the upper edge of the installed cover is 15-20 cm below the ground level. Under the installation of the hatch, you will have to lay out a brick or pour a neck out of concrete, but the lawn planted on top will feel good and will not differ in color from the rest of the planting. If you take a finished cover with a hatch, you can pour only 4-5 cm of soil. On such a layer of soil, the lawn will differ in color and density, paying attention to what is under it.

- Point storm water inlets. These are relatively small containers that are installed in places where precipitation accumulates. They are placed under drainpipes, at the lowest points of the site. Storm water inlets can be made of plastic or concrete. Concrete is used for deep storm drains. They are put one on one, achieving the required height. Although today there are already built-in plastic storm water inlets.

- Linear storm water inlets or drainage channels. These are plastic or concrete gutters. These devices are installed in places of the greatest amount of precipitation - along the roof overhangs, if a drainage system is not made, along the footpaths. Can be installed under gutters as gutters. This option is good if you have not laid pipes to drain water. In this case, the receivers are placed outside the blind area, and the second end of the tray is connected to it. This is a way to make a storm sewer without destroying the blind area.

- Sand traps. Special devices in which sand is deposited. They usually put plastic cases - they are inexpensive, but reliable. They are installed at some distance from each other on long sections of the pipeline. Sand and other heavy inclusions are deposited in them. These devices need to be cleaned periodically, but this is much more convenient than cleaning the entire system.

- Lattices. In order for water to drain better, the holes in the grate should be large. They are:

- Pipes. For storm sewers, it is best to put polyethylene pipes for outdoor use (red color). Their smooth walls do not allow precipitation to accumulate, and they also have a greater conductive capacity than pipes of the same diameter from other materials. Cast iron and asbestos pipes are also used. A little about the diameter of the pipes for storm water. It depends on the amount of precipitation, the branching of the system. But the smallest diameter is 150 mm, and better - more. The pipes are laid with a slope of at least 3% (3 cm per meter) towards the storm water inlets, and then towards the well.

- revision wells. These are small plastic or concrete wells, which are placed on an extended section of the pipeline, at the points of branching of the system. Through them, if necessary, clean the pipes.

In long sections, revision points are needed - to clear possible blockages in pipes
Storm sewers in a private house do not always contain all these devices, but a system of any configuration and complexity can be built from them.
Construction order
In general, you first need to create a project. If there is no possibility or desire to use the services of professionals, draw it to scale (on a piece of paper or in one of the programs). So you can pretty accurately determine what you need and how much. Having bought necessary materials you can start work.
First install the drainage system. Then begins the installation of storm sewers. It makes sense to carry out this work simultaneously with the laying of drainage and sewer systems, as well as to carry out preparation work for laying paths and blind areas. All of these jobs require soil removal, so why not do it all at once?

Installation of a storm water inlet - pour concrete and “load” with something heavy so that it does not squeeze out
If other systems are already ready or they are simply not needed, trenches can be dug. They should be 10-15 cm more than the required depth. Crushed stone is poured into the bottom of the trenches, and pipes are laid in it, and devices are installed. Crushed stone will neutralize the heaving forces: it always remains mobile, so that under loads it simply moves from place to place. As you know, the load devices installed in it almost do not feel.
When installing storm water inlets, they are concreted. Formwork is placed around, poured with a layer of concrete of 15-20 cm. It must be calculated so that the finish coating that you are going to lay normally “lies”.
1.
2.
3.
4.
5.
Nature never divides people into those who are ready for various phenomena, and those who have not yet prepared. She simply demonstrates her abilities: summer rains, autumn thunderstorms, spring floods and winter snows. To protect against natural phenomena, a storm sewer was invented, which allows you to remove all precipitation from the site.
Many people mistakenly believe that storm water is limited to a few pipes arranged on the edge of the roof of a building. This is not so, although gutters are also part of the design. About how the storm drain is arranged, what it is, and how to make a storm sewer with your own hands and will be discussed in this article.
Construction of storm sewers around the house
There is a division into the main components that make up the stormwater system, and additional ones that ensure the maximum efficiency of the system and allow it to fully perform all functions.The basic set of storm sewer elements includes the following:
- drainpipes with funnels and gutters: these are the names of the part of the structure that collects liquid from the roof of the building;
- point water collectors and storm water inlets;
- pipelines providing transportation of collected water to the collector;
- a tray system connected to a linear drainage system and transferring the collected water to the pipeline (read also: "").
- special plugs that block the movement of water in the opposite direction;
- siphons that prevent the spread of an unpleasant odor from the sewerage collector;
- sand traps.

Before you make a storm drain, you need to stock up on tools and materials. A shovel and a drill will be enough to complete the work. With materials, everything is more complicated, but not much: bituminous mastic and fasteners for pipes must be added to the list of the above parts.
The principle of operation of storm water in a private house
To create a high-quality storm sewer, you need to figure out how concrete, plastic or cast-iron storm drains work. The basic principle: all drains are collected in one channel and sent to a common collector. Each structural element must be connected to the overall system.Proper stormwater drainage on the site works like this: first, precipitation is collected from the roof of the building and sent to the drains, then they move by gravity to the storm water inlet, and from there all the water moves through the pipes to the collector.An important part of the design is linear drainage. To equip it, it is necessary to install trays at ground level where water will be collected in the maximum volume (read: ""). Each storm tray is connected to the system and drains water further through it, but there are also schemes that allow water to be drained not underground through a pipeline, but on the earth's surface.
Do-it-yourself spot storm water installation
In order for the stormwater around the house to work correctly, it is necessary to carefully monitor the sequence and quality of actions during its arrangement. Before creating a structure, it is worth performing a stormwater calculation. The first step is to install funnels, which are most often called storm water inlets. Funnels should be installed where the water collected by the drain located on the roof of the building flows. To install storm water inlets, it is necessary to prepare small recesses.Such a drainage system provides that storm pipes and funnels must be connected, so the latter are equipped with special holes. Through them, with the help of a knee, a pipe is installed, directed underground, and as a result, it reaches a level where the soil does not freeze in cold weather. At this depth, the pipe is leveled, for which the elbow is again used, and is installed in a horizontal position, apart from a slight slope necessary for the movement of fluid by gravity.From the pipe, water enters the collector, which is a special reservoir that provides temporary storage of storm drains (read also: ""). After some time, the collected liquid will be sent to the ground or pumped to the nearest reservoir. The upper part of the collector must be equipped with a manhole with a manhole. The diameter of the well is usually in the range of about one meter. Without manhole access to the interior of the storm drain and its cleaning will be impossible.

In addition to spot stormwater drainage, there is a design that works due to trays with gratings (more details: ""). This system is called a linear storm sewer. The trays are mounted directly on the ground, and the water that the funnels could not collect gets into them. The gutters of the structure can have different depths and sizes. Above the gutters, it is worth installing cast-iron storm grates to prevent various debris from entering the system. At the junction of the trays and pipelines, it is necessary to install sand traps, which will to a large extent protect the system from various debris. In front of the house, you can install special concrete storm drains, which have a large width, which prevent the formation of puddles right next to the entrance threshold.
Combination of drainage and storm sewers
There are some recommendations that allow you to properly install drainage and storm water. Drainage and storm systems should not be connected due to the high load that can occur after heavy rain. Drainage should be installed at a great depth below the freezing level of the soil (more details: ""). The drainage trench must be backfilled with a layer of gravel and crushed stone so that the pipeline can withstand the load exerted by groundwater and melt water.
When laying the drainage, a certain slope of about 2% must be observed. Drainage flows must be discharged into a ditch or the nearest body of water. Stormwater in a private house is usually located on top of the drainage system, that is, the latter is installed first. In any case, both systems must be at a sufficient depth so that their elements do not freeze through during the cold season.
There are a few tips that will simplify the installation of stormwater. The number of earthworks can be reduced by laying the drainage and storm system in one trench (without combining them at the same time). The need for separate laying of systems was mentioned above: this was done to prevent overloading the structure during floods or downpours.The drainage trench must be deep enough to take into account the depth of soil freezing. In addition, it is important to take into account the thickness of the sand or gravel layer when arranging the trench. The slope of the drainage trench is usually about 2 degrees.Laying pipes for storm sewers must also be carried out at a sufficient depth, and when arranging two systems in one trench, this nuance must be taken into account. All pipelines that transport water must eventually be connected to a collector that will provide temporary storage and further diversion of water to the reservoir.
When the storm drain around the house is built, it is imperative to test it. To do this, you need to fill each funnel with at least a bucket of water and watch how the water passes through the system to make sure that it reaches the final destination.
Conclusion
The device of storm water around the house is not difficult, it can be created even in the absence of deep knowledge in construction. It is enough to strictly follow the algorithm for the construction of the system, design it with high quality and carefully carry out all the work. As a result of all these actions, storm sewers will ensure the drainage of water from the site, and the objects located on it will not be in danger of flooding, and it will be much easier for residents of the house to move around the territory that is not flooded with numerous puddles.
