It is difficult for us to live without conveniences, even while in a private house. We strive to provide maximum comfort, creating an optimal standard of living for your family. For this, it is very important to think over the construction issue in advance.
When constructing a sewage system with your own hands in a private country cottage, You can save money, but you need to carry out these works in accordance with the construction and installation requirements.
Sewerage in the house involves the arrangement of external and internal sewerage.
Internal is the piping, installation of the fan pipe and the riser.
The external includes a set of pipes running from the house to a septic tank or deep cleaning station.
Internal sewerage scheme

This septic tank has three chambers interconnected. Water enters the first, settles and leaves solid waste in the sediment. Then it is pumped into the second, which is the aeration tank, where water is mixed with activated sludge from microorganisms and plants. All of them are aerobic, and forced aeration is necessary for their life.
Then, water and sludge enter the third chamber, which is a deep cleaning settler, after which the sludge is pumped back to the aeration tank by a pump.

The aeration tank is quite expensive, but it does not have any restrictions on its installation. Of the minuses, one can only say about the need for electricity, and permanent residence, so that bacteria do not die.
Elements of the external sewerage system are exposed to significant pressure of the soil layer, moisture and frost, therefore, the sewerage system must be laid in accordance with all the rules. If you are going to lay the sewer yourself, you must carefully select Construction Materials and take into account the peculiarities of installing the system in the ground.
Before laying the sewage system, you must choose the right pipes. The materials used for the installation of indoor and outdoor sewerage are different. The yard (external) sewer pipeline connects the outlets from a house or a group of houses. Through it, wastewater is discharged into the external sewerage network in the presence of a centralized system. A septic tank is being built for sewerage in a private house. Until recently, the industry produced pipes for outdoor sewerage:
- cast iron;
- steel;
- asbestos-cement;
- ceramic.
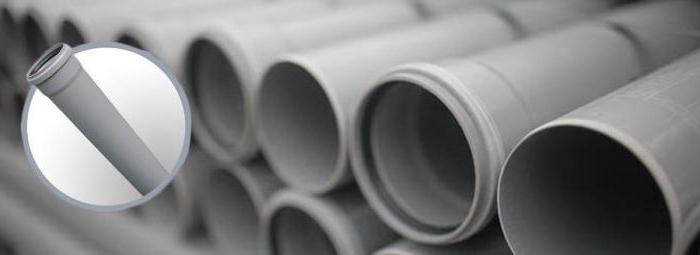
Today, in the building materials market, the leading place is taken by pipes for outdoor installation made of plastic due to their availability, ease and simplicity of installation. To understand which pipes are best used for outdoor sewerage in your area, let's get acquainted with their advantages and disadvantages:
- Polyethylene, durable, flexible, which allows you to reduce the number of joints when laying, shock-resistant.
- Polypropylene is tougher than polyethylene, withstands high temperature and pressure, therefore they are often used when installing pipelines hot water and heating. Manufacturers guarantee 50 years of service if used correctly.
- Polyvinyl chloride (PVC) pipes of medium hardness are laid to a depth of 2 to 6 m. The maximum temperature of the effluent should not exceed 40 ° C. PVC pipe can crack even with a slight impact.
Plastic pipes are smooth inside, therefore they do not accumulate deposits, they are resistant to any aggressive substances found in domestic wastewater and in the ground. For outdoor sewerage in a private house, you can use pipes with a diameter of 110 mm. Larger diameter pipes are used to drain wastewater from high-rise buildings or industrial facilities. Please note that the sewer pipe for outdoor installation is marked every 50-100 cm. It indicates the outer diameter, length, name of the material, manufacturer and allowable pressure.
For the installation of an external sewage system, the necessary fittings are selected from plastic pipes:
- couplings;
- knee;
- plugs and more.
Required tools
The relative position of the water supply and sewer pipes is presented strict requirements, since sewage can become a source of contamination of drinking water.
- It is forbidden to lay water pipes in the same trench together with the sewerage system.
- If the installation assumes an intersection water pipe and sewer, then it should run at right angles. The water supply pipeline must run at least 40 cm above the sewer.
- The distance between the entrance to the house of the sewage system and the water supply must be at least 1.5 m.
- Waste water must not be discharged at drinking water intake points.
After the pipes for the sewer are installed, it is necessary to check the correctness of the selected slope and the tightness of the system. To do this, a small amount of water is poured into the sewage system and an inspection is carried out. The identified shortcomings are eliminated. The laying of sewer pipes in the ground ends by entering them into a septic tank. After that, the ditch is filled up.
As a rule, the laid pipeline is covered with previously selected soil, while removing stones and crushing dense lumps. The best option is to fill the trench with sand. The tamping of the backfilled soil over the pipe begins after its layer is 30 cm. They fill up a trench with a mound, over time it will settle.
Laying sewer pipes in a private house can be done independently. Before performing work, a novice master needs to familiarize himself with the requirements of building and sanitary standards, as well as have the skills to work with a locksmith's tool. For the construction of an external sewage system in the ground, the following tools are required:
- angle grinder;
- hacksaw for metal;
- file;
- roulette;
- level;
- shovel;
How to determine the slope of a pipe in a trench
 To determine how to properly lay the sewage system, you need to draw up a project that takes into account:
- depth of soil freezing;
- the depth of the entrance of the sewer pipe into a septic tank or a common pipe;
- number of turns;
- closeness groundwater.
The correct laying of sewer pipes in the trench implies observance of the slope. The bias of everyone running meter pipes with a diameter of 110 mm must be at least 2 cm towards the drain. With a lower slope, the water will go into the general sewer slowly, without the effect of self-cleaning. Since when drains are removed from the house, their temperature is 15-20 ° C, it is enough to deepen the exit from the building by 50 cm. If it is not possible to lay the pipe at such a depth, it must be well insulated. The pipeline is not buried in the case of a close occurrence of groundwater, in this case it is insulated along its entire length. You can use the following materials for underground sewage:
- foamed polyethylene;
- Styrofoam;
- expanded clay.
The pipe trench should be with a minimum number of turns, optimally straight. If there are bends in the trench and the length of the system is more than 12 m, inspection wells are installed to eliminate blockages and breakdowns. The laying of an external sewerage system at the first stage involves excavation work. For pipes with a diameter of 110 mm, a trench is dug 60 cm wide and 10-15 cm deep below the designed one to create an amortization cushion.
The bottom of the trench is well leveled and tamped. Sand or fine gravel is poured onto the bottom. As a rule, the assembly of the sewer pipeline is carried out outside the trench due to the inconvenience of working in it. Then the pipes are carefully lowered into the trench and laid on a sand cushion according to the calculated slope. The slope angle is measured, sand is added if necessary. Do not make the slope very large, the water should not drain off in a bubbling stream. It is necessary to lay the sewer pipes in the trench without sagging, under the guide cord.
Installation of the pipeline in the ground
The technology involves laying a sewer pipe in the ground with a socket against the flow of drains, that is, from the house. Shortening of the pipe socket and fittings is prohibited. Before laying the pipe, you must:
- clean the inner cavity from possible contamination;
- check for the presence of O-rings;
- prepare the necessary bends to change the direction of the pipe, if necessary.
Perhaps there is a bathhouse or other structure on your site, from which water must be diverted. The pipe from this room will cut into the main system through bends. Elbows are available with 15, 30, 45 or 90 ° elbows. At the junction do inspection well round or square. Its walls are usually laid out with burnt bricks. It is enough if the inspection well is 70-80 cm wide. An audit is installed at the point of pipe connection or turn. To prevent the ingress of groundwater and atmospheric precipitation into the well, a clay castle is arranged at the bottom of the well and around it. To connect pipes and fittings, it is recommended to use:
- technical petroleum jelly;
- silicone lubricants;
- liquid soap.
These aids contribute to tightness and ease of assembly. The assembly technology is simple: the smooth end of the pipe is lubricated to the length of the joint and inserted into the socket with a seal. When installing, preference is given to double-breasted O-rings (with two protrusions).
Connecting pipes made of different materials
In some cases, when installing the system, it becomes necessary to join pipes from different materials... This can be the connection of an old cast-iron riser with a plastic external drain, or vice versa. In any case, cast iron and plastic will be combined. The connection is made using a rubber sleeve, which can be purchased from a plumbing store. The process technology is as follows:
- The socket is cleaned from dirt, rust, paint and dried.
- Applied to the inner surface of the socket sanitary silicone so that it fills in the existing recesses.
- Silicone is applied to the outside of the cuff seal.
- The cuff is inserted into the socket.
- A plastic tube is inserted into the cuff.
If the cast-iron socket is damaged, it is cut off with a grinder. The connecting operations are almost identical, except that the cuff is put on cast iron pipe... After these operations, it is necessary to allow the silicone to dry for 2 hours. Then they start checking the system.
Treatment plants
 In some cases, laying sewer pipes under right angle impossible due to the terrain. Then the pump is installed and the removal of sewage is forced. Also, the problem difficult terrain can be solved with the help of a modern deep biological treatment station (tanker), since it can be installed 2 m from the house. Aerobic bacteria process fecal matter, converting them into sludge, which is removed 1-2 times a year and used as fertilizer. Wastewater is 98% purified. The indisputable advantages of the tanker are:
- the processing process takes place ten times faster than in a septic tank;
- the purified liquid can be collected in a tank and used for watering plants;
- the installation takes up little space and the soil under it is not contaminated.
The disadvantage of a biological installation is its high cost and the need for constant monitoring of the living conditions of bacteria.
The location of the treatment plant is determined when planning the entire site. In addition to a tanker for sewage drains in a private house, you can use the following disposal devices:
- Cesspool with a filter bottom. The distance from the cesspool to the water intake should be at least 30 m. Arrange it so that the contents can be pumped out with sewage equipment. This type of plum collection is suitable where people do not live permanently, for example, in summer cottages.
- A cesspool without drainage is a sealed waste storage tank. The disadvantage of a sealed pit is that you often have to turn to the services of a sewer.
- The septic tank consists of 2-3 chambers connected to each other, each of which has a drainage cushion so that the water goes into the ground. The purification capacity of the septic tank is 60-70%. A septic tank is built 1 m above the groundwater depth, at a distance of 25 m from the water intake and at least 5 m from the house in order to avoid soil erosion.
Depending on the number of people living in the house and the daily water consumption, each site owner himself chooses which local device suits him best.
When the above conditions are met, the system will work efficiently without causing harm. environment... A well-designed and built sewerage system will not bring you unnecessary worries and will be the key to your peace of mind.
If desired, even private house in the countryside you can equip. The first thing that a resident of a country faces is the lack of a warm toilet in the house. Without sewerage, a person is deprived of many amenities. This is not a luxury, it is a necessity. Sewerage laying in a private house is a complex process that requires taking into account every little thing. How can this be done?
External and internal
The work related to the arrangement of the sewage system in a private house begins with the design of the internal and In the first case, the installation of a drain pipe, a riser is required, as well as the distribution of pipes to all rooms where this is required: a kitchen, a toilet, a bathroom, and so on. Concerning external system, then this is everything that is located outside the house. Its arrangement requires piping to the septic tank. You can also connect the sewer to a deep cleaning station.
The task is greatly facilitated if it is possible to discharge waste water into a centralized system. If the house is located in an isolated area, then a system with a homemade septic tank should be created. It can be with or cumulative. A cesspool is not suitable in this case.
Layout in a private house
Before starting work, you should draw up a plan for laying pipes inside a private house. The process is greatly simplified if all wet rooms are located in close proximity. The scheme is drawn up strictly individually. In the process, you should take into account all the features of the house and the location of the premises. Ready option can look anything you like.
When designing a sewage system inside a house, it is necessary to accurately calculate the location of the collector pipe. Only then can you determine where the rest of the system will be laid.

How to make a correct diagram
The sewerage scheme in a private house is an important stage. The quality of the system and its reliability depend on how correctly the plan is drawn up. Stages of drawing up a diagram:
- On a piece of paper, preferably in a box, you need to recreate the plan of the house. When drawing up a plan, it is worth considering the scale.
- Then it is worth deciding on the location of the riser or collector pipe.
- At all levels of the building, it is necessary to note the location of the plumbing. At this stage, you should learn about how to connect it.
- From plumbing, it is necessary to lay pipes on paper to the riser. In this case, all connecting elements, tees, branches and corners.
- You need to measure the length of each item internal system and summarize the data. The result will be the required number of pipes. In this case, the diameter of the material must be taken into account.
The final stage is drawing up a diagram of the external system: the release of pipes, their laying to the septic tank. In this case, it is necessary to take into account all the requirements specified in SanPiN 2.1.4.1110-02, as well as SNiP 2.04.03-85.
What you need to consider when arranging the internal system
The laying of an internal sewage system in a private house begins after drawing up an approximate diagram. There are several nuances to consider at this stage:
- To drain wastewater from the toilet, pipes with a diameter of 10-11 cm are required. Their total length must be at least 100 centimeters.
- For gray drains that enter the common riser from the kitchen and bathroom, pipes made of PP or PVC are required. The diameter of the material should be 5 centimeters.
- To arrange turns in the system, it is necessary to use several plastic elbows made at an angle of 45 °. This reduces the risk of blockages during the use of the sewer.
- It is best to use polypropylene for arranging the sewage system inside the house, or this material is more durable, reliable and relatively inexpensive. When using such pipes, laying a sewage system in a private house is simplified.

Choosing pipes
Sewerage installation in a private house requires careful preparation. After drawing up a diagram and carrying out the necessary calculations, the purchase of materials is required. Gray pipes are used for wiring inside the house. For the arrangement of the external system, orange pipes are required. The difference in color can be explained by logic. Orange hues are best seen in the ground. In addition, pipes have differences in properties. First of all, it concerns the material. Pipes underground must be able to withstand more severe loads. The material for their manufacture must be more rigid.
In order for the laying of a sewage system in a private house with your own hands to be successful, you can use two-layer corrugated pipes. But, as practice shows, their use is often inappropriate. After all, the depth of the sewerage in a private house is from 2 to 3 meters. It is much cheaper and no less effective to use orange pipes. Most often, a material with a diameter of 11 centimeters is used to equip an external system. This is quite enough for normal wastewater disposal.
How to lay pipes? It's simple!
Do-it-yourself sewerage installation in a private house requires certain skills and patience. The most difficult stage is the placement of the pipes and their fastening. It is almost impossible to do this alone. Therefore, an assistant is required to work. This will not only speed up the process, but also improve the quality.
The easiest way to lay sewers is to use PVC pipes or PP. A fairly wide range of similar products is produced. If necessary, you can purchase material of the required diameter, tees, elbows and revisions. It should be noted that each part is equipped with a special rubberized insert - a cuff. Thanks to this element, laying the sewerage system of a private house takes a little time. Joints are connected easily and reliably. If desired, you can process the seams additionally. A silicone-based plumbing sealant is suitable for this.
Things to Consider
When laying pipes, it is necessary to take into account some of the nuances:
- If the pipes run through walls or ceilings, then they must be placed in special sleeves, which can reduce the load on the fragments of the system.
- The slope of the elements of the sewer system depends on their diameter and is spelled out in SNiP 2.04.03-85. For example, for a material whose diameter is 5 centimeters, this indicator should be 3 cm / m, and with a diameter of 10 to 11 centimeters - 2 cm / m.
Sewerage outlet arrangement
If a problem has arisen and the internal system has a discrepancy with the external one, then the laying of sewer pipes in a private house should begin with the release. This is the border area between the systems. At this point, the riser is connected to the pipe leading to the wastewater collection tank.
It is necessary to mount the outlet through the wall of the foundation. The depth of its laying should be lower than the depth of soil freezing. Otherwise, in winter period difficulties may arise during the operation of the sewage system. If the outlet hole was not specified during the construction of the building, then it will have to be punched. Its diameter must correspond to the dimensions of the pipe in the sleeve. The latter should be longer than the hole. On each edge, the sleeve must cover the pipe by more than 15 centimeters. These are the basic requirements for a sewer outlet.
Installation of a riser and further wiring
The pipe size from the riser to the toilet should be 1000 mm. This allows you to determine its location. It is better to mount the riser in the toilet itself. The installation can be hidden or open. It all depends on where the pipe will be installed. You can install the riser close to the wall. For this it is worth using pendants and clamps. You can also mount the pipe in a niche, in a channel or in a box.
To connect the riser and the rest of the system, you can use oblique tees. If the pipes are different in diameter, then adapters should be used to connect them. They eliminate the need for a sealant. In places where there is an intersection of elements coming from a shower, sink or bathtub, it is necessary to install a collector pipe. Its diameter should be between 10 and 11 centimeters. Do not forget about water locks. These elements do not allow unpleasant odors penetrate the living quarters.
On each floor, a revision is installed in the riser - a kind of tee designed to clean the system with a strong blockage.

What is a fan pipe
Observing the rules for laying sewers in a private house, you can easily create an external and internal system. In addition to installing a riser, it is also required fan pipe... This is its continuation, which is displayed on the roof of the house. This part is installed on the riser. The revision is mounted at the junction. After that, the funnel is led out into the attic at an angle. Do not connect it to the ventilation system of the building or to the chimney.

Varieties of septic tanks
Laying an external sewage system in a private house is no less important stage than installing an internal system. With the wrong arrangement, problems can arise not only with comfort, but also with environmentalists. One mistake can turn the sewer system into a big smelly problem that will take a lot of time and money to fix.
You should start with a septic tank device. Sludge type structures are most often used. This is a container or their combination through which the drains pass. They are gradually cleared. This is due to the deposition of heavy inclusions. After that, the drains undergo additional purification in a filtration well or on the field. In this case, both mechanical and biological cleaning methods are used.
There is another, simpler type of septic tank - accumulative. In this case, a closed container of a sufficiently large volume is installed. All drains are collected in it. To empty such a septic tank, pumping out the sewage system is required, which is carried out.This method of arranging an external system is easier to carry out. Plus it's cheaper.

How to calculate the required volume
Calculating the dimensions is not that difficult. The volume is determined based on settling for 3 days. At the same time, the average consumption per person per day is 200 liters. If desired, this indicator can be calculated individually. If two people live in the house on a permanent basis, then the volume of the tank for the septic tank should be:
2 x 200 x 3 = 1200 liters or 1.2 cubic meters.
Stages of installation of the outdoor system
Sewerage in a private house does not end after the complete installation of the internal system. After all, the arrangement of the outer part is required. Stages of arrangement of the external system:
- First, you need to prepare materials: a ready-made container of the required volume from PP or a ring of reinforced concrete. If desired, you can lay it out of bricks or fill in a monolith.
- The next step is to determine the appropriate wastewater treatment method.
- After held excavation: a pit is dug under the container and trenches for laying pipes.
- All structural elements must be connected. At the same time, do not forget about the comfortable maintenance of the septic tank.
- Pipes should be installed at a specific slope. This indicator should be 2 cm / m. The joints must be sealed.
- The septic tank should be equipped with a ventilation system.
- Having carried out work on heat and waterproofing of individual fragments of the system, you can fill the structure with soil.
When placing a septic tank, it is worth considering the location of buildings on a personal plot. You should not place a waste container near a recreation area or playground.
In conclusion
Now you know how the sewerage system of a private house is carried out. If you follow all the rules, you will get a reliable system. Before starting the operation of the sewage system, it is worthwhile to run it. For this, the system must be flushed clean water... This will allow you to identify all the shortcomings and correct them. Only then can the operation of the sewer system begin.
In fact, the process of editing individual fragments is not difficult. The main thing is not to make mistakes when drawing up the sewage scheme, as well as to make the correct slope of the pipes. Otherwise, the system will not function normally.
Nowadays, it is almost impossible to imagine a private house without the plumbing benefits of civilization. Bathrooms, showers, household appliances and other equipment, in one way or another, should be able to remove sewage from outside the home.
It will be very difficult to do this without a high-quality liquid drainage system.
Design
Sewer system design, all auxiliary and treatment facilities it is worth doing even at the design stage of the house. This will make it possible to correctly arrange all communication channels, which, accordingly, will allow the entire system to work effectively in the future.
It is desirable that the entire internal and external highway has as few complex nodal connections and sharp turns as possible. At this stage, you can also calculate the diameter of the pipes and, of course, select the pipes themselves.
 Photo: plan-diagram of the sewage project
 The design of sewer canals is very closely related to the laying of a water supply system. Often, the main water supply pipes are mounted together with a central sewer riser.
This suggests that the entire design procedure should take into account other communications at home, to facilitate the wiring of systems and the rational use of special channels.
 Photo: prepared pipe channels
 The design part of the sewerage system also includes the determination of a place for a septic tank, drainage pits and other external communications.
Important! Without taking into account the level of freezing of the soil, as well as the depth of the groundwater, it is impossible to correctly calculate all the volumes of external work.
Best of all, specialists of the appropriate profile will cope with this task, and further earthen and assembly work you can do it yourself.
Determination of the angle of inclination
Since most systems are gravity-fed, the angle of inclination of the pipes during installation plays a very important role. If the slopes are not observed, blockages and failure of the sewage system are inevitable. But if you follow certain rules, then this can be avoided.
 Photo: observance of the angle of inclination
 Firstly, different diameters are not the same. The greater the internal permeability of the channel, the smaller the angle of inclination is made.
It is also worth considering the inner coating of the pipes - with a rough structure of the material, the angle, although not significantly, should be increased.
Exists regulations, which determine the correct slopes for sewer pipes of various diameters. So, for example, for the most popular pipes in modern sewage with a diameter of 110 mm, the slope should be at least 0.02 (2 cm per 1 m / n).
 Photo: dimensions of the angle of inclination
 Installation of a pipe with such a slope will allow the sewage to move at a normal speed and will not allow suspended particles to precipitate.
Below is a table with slopes for the most common pipe diameters for plumbing fixtures:
| Plumbing fixture | Pipe diameter, mm | Tilt angle |
| Toilet bowl | 100 | 1:20 |
| Bath, shower | 40-50 | 1:48 |
| Sink, sink | 40-50 | 1:12-1:36 |
| Bidet | 40-50 | 1:20 |
When laying the lines, adhere to the angles of inclination described below:
- for pipes with a diameter of 50 mm - 3 cm per meter;
- for pipes with a diameter of 160 mm - 0.008 cm per meter;
- for pipes with a diameter of 200 mm - 0.007 cm per meter.
For clarity, consider one example. Let's say that the length of the pipeline is 10 meters. Pipe diameter 50 mm. This means that the difference between the bottom and top edge of the pipe should be 30 cm (0.03 x 10).
How to turn sewer pipes
When installing an internal sewage system in a private house, it becomes necessary to change the direction of the pipe.
For this procedure, all kinds of fittings are used, which may differ not only in angular characteristics, but also in design data.
Important! It is also worth remembering that any connection is a guaranteed leak point if the parts are not joined correctly. Swivel fittings are also a place for sediment build-up and blockages. Therefore, it is necessary to install revisions in especially difficult areas.
 Photo: fitting for sewerage wiring
 Based on this, it is worth taking a very responsible attitude to the turning nodes of the pipeline. To begin with, you should abandon the turns of the pipes by 90 degrees in the horizontal plane.
It is best to replace this assembly with a 45-degree fitting. If this is not possible, then it is advisable to install a revision well at the turning point.
 Photo: revision well
 With internal wiring of the sewage system, it is worth avoiding joining the bends with the central riser at a right angle. To a greater extent, this applies to kitchen taps.
At first, it will make it impossible correct installation angle of inclination.
Secondly, the specificity of kitchen drains is such that grease and food particles cannot be removed properly.
Important! Particular attention should be paid to connecting the toilet. There should be the least number of swivel nodes at this point, therefore, the installation of this plumbing is carried out, as close as possible to the outlet channel.
Regardless of the number of sewer risers in the house, all are combined into one sewer branch, which diverts the effluent further to treatment or storage facilities. In most cases, this is the basement.
 Photo: sewer junction
 Pipe turns in this sewer "junction" should be made with fittings with a rotation angle of 45 and 90 degrees.
In this case, it is imperative to strengthen the entire structure with retaining suspensions and the installation of revision units.
Prevention of unpleasant odors
Unpleasant odors can appear in your home for several reasons. The most common of them are poor ventilation of the room, in particular the bathroom, and problems with water seals.
If ventilation can be dealt with without any problems by installing an exhaust fan, then with siphons it is not so simple.
The problem may be a mistake made during the installation of the pipeline. Absence or incorrect (negative) slope can cause blockage and, as a result, narrowing of the passageway occurs.
 Photo: narrowing of the sewer pipe through passage
 This can cause a complete blockage of the drain, then due to the overflow of the pipe, water can be sucked out of the siphon, opening the way for sewer gases.
Also, the reason may be the installation of pipes of a smaller diameter, not provided for this type of plumbing. It can be eliminated either by cleaning, or, which is most difficult, by reworking part of the pipeline.
 Photo: clearing the blockage
 In the case when unpleasant "aromas" have not yet filled the room, it is worth taking a number of preventive actions.
They include:
- washing kitchen channels from the accumulation of fatty deposits with boiling water and detergent;
- timely cleaning of siphons from garbage accumulated in the sump;
- the dishes should be washed after cleaning them from food debris;
- do not throw various garbage in the toilet, in the form of newspapers, papers, etc.
Another point that occupies a special place in the installation of sewage is ventilation pipes in septic tanks and cesspools.
In their absence, the sewer gas will surely find a way out, and it will, most likely, in the restroom or shower.
Construction of inspection hatches
For full service and cleaning of the sewer network, as well as for free access to the pipeline, inspection hatches are used.
Depending on the installation location, they can be ceiling, wall and floor type. With regard to sewer systems, we will consider the last two types.
Wall hatches are often disguised as tiles, thereby visually not violating the integrity of the coating. The structure itself is made in such a way that when the hatch is closed, the possibility of damage to the glued tiles is completely excluded.
 Photo: built-in inspection hatch
 Wall-mounted inspection hatches are of two types and differ in mechanism. The first type is push-type, the name of which in itself speaks of the principle of operation. The hatch consists of metal frame with hinged door.
Also, the inspection hatch mechanism has magnets to fix the hatch in a closed state.
 Photo: inspection hatch
 The second type is frontal-hinged. It has a similar design to the pressure hatch, but differs in the design of hinges and fixing latches.
The door, with the help of a pivot mechanism, can not only open, but also move to the side, which allows access to the entire revision. The hatch is opened using a suction cup.
Compound
The correct and consistent procedure for installing the sewage system is only half of what is required for the normal functioning of the entire network. An important role in the assembly process is the connection of pipes.
After the locations of the taps and revisions have been determined, the assembly begins sewer riser... Performing this procedure for one person is quite problematic, so at least two people should take part in the process.
The pipes are connected to each other by means of the socket of one pipe and the smooth end of the other. Previously, a rubber sealing ring is inserted into the groove of the bell.
To facilitate the connection, the ring is lubricated with any grease that does not contain chemically active compounds that corrode rubber.
 Photo: socket connection method
 The installation of the connected parts of the pipeline should be done with the socket downward, in the direction of the future drain. In places where plumbing is connected, couplings with taps are used.
Fitting the pipe to size is done by cutting with a hacksaw. The sharp edges of the pipe are filed so as not to damage the O-ring when joining.
 Photo: shortening the pipe
 For a good connection and prevent leaks, the O-ring in the socket must sit tightly and not be skewed.
 Photo: O-ring connection
 Important! To compensate for the thermal expansion of pipes during operation, during the connection of the socket-pipe assembly, a gap is left, but not more than 10 mm.
This is especially true when installing an outdoor sewerage system in a private house, because this branch of the sewage system is most susceptible to heat stress and soil pressure.
As you can see from the article, it is not so difficult to assemble the sewer system in a private house.
The main thing is to choose the right pipe material and make all the calculations. Particular attention should be paid to the installation of the slope angles of the line and the connection of pipes. And it is worth remembering that a properly assembled system will last a long time without requiring frequent intervention in its work.
Video: installation in a private house
Gone are the days when in country and private houses all the amenities were on the street. Now, to create basic comfort, it is necessary to lay a sewer in a private house. This very important task is not difficult.
To lay a sewer in a private house with your own hands, you need to start by creating a competent project. When constructing a new building, it is important to design drains not according to the residual principle, but in combination with all systems, since the sewerage system is one of the most important points of life support for a modern house.
And also it is necessary to clarify in advance - is it possible to connect private housing to the centralized sewerage system. This will save money and time for construction. You need to know what kind of soil can lie near the house, geological exploration will help with this.
The project for the sewer system of a private house should include the following items:
Installation of external sewerage
According to SNiP 2.04.03-85 “Sewerage. External networks and facilities "from bearing capacity soils depends on the type of cushion for the sewer pipeline. In trenches in rocky soils, a pillow with a thickness of 100 mm from carefully compacted sand or gravel is provided. An artificial foundation is made in peat, silty and other weak soils. For other types of soils, it is enough to carefully tamp the direct bottom of the trench.
The depth of the pipe supply depends on the level of soil freezing in a given area. The top of the water supply must be below the freezing point. If the height of the soil layer is less than 700 mm, the drainpipes must be insulated and protected from damage if the passage of ground vehicles is expected from above.
The bottom of the trench must be cleared of debris and large stones, and the base is being prepared. The pipeline must be brought to the house from the point of discharge of the sewage system with a minimum number of turns. If they cannot be avoided, then smooth pipe bends are used. Pipes and fittings are connected to each other using sealant.

The sewage supply to a private house should be under the necessary:
- for a pipe with a diameter of 160 mm, a slope of 0.008 is required;
- for a supply pipe with a size of 110 mm - 0.02;
- a pipeline with a diameter of 50 mm must be laid at a slope of 0.03.
At the exit from the building, a metal sleeve is inserted into the foundation hole for laying pipes in it. The remaining space must be filled with insulation, for example, mineral wool.
Fulfilling these simple conditions, you can protect yourself from a sudden breakthrough of the external sewage system or freezing it in winter. For example, the process renovation works in the cold season, it is complicated by digging a trench in frozen ground.
Collection and storage of effluents
In the absence of an opportunity, several options for the local system of discharge, storage and treatment of effluents are used:
- cesspool;
- septic tank.
Traditional cesspools not the best way, from the point of view of ecology. But they are the most in an economical way organize an autonomous storage device for household waste water. Choosing this method, it is important to properly organize the placement of the pit:
- The distance between the cesspool and the well must be more than 25 m.
- The drainage well should be located further than 5 m from the house.
- With a sewage capacity of 8 sq. meters, the distance increases to 8 m.
- The distance from the cesspool to the border of the site must be at least 1.5 m.
- A cesspool is located downstream of the groundwater flow to prevent runoff from entering the wells.
- The cesspool is located below the level of the house.
The material for the construction of the cesspool is traditionally red brick. If there is a possibility of an entrance, special equipment equips a pit from ready-made ones with a pre-concreted bottom. The structure is covered with a slab with an inspection hatch and a built-in ventilation pipe.
A more progressive solution for organizing waste collection is a septic tank. It usually consists of two or three chambers. In the first chamber, the solid fraction settles and decomposition takes place with the help of bacteria. The filtered liquid is sent to the next tank for further purification. In the last chamber, the purified liquid seeps through the gravel base into the soil. The septic tank must be equipped with a ventilation pipe with an umbrella. The structure must be emptied from precipitated solid waste once every 5–10 years. Such constructions are already obtained in finished form.

Internal wiring
In addition to arranging an external sewage system, it is important to know how to properly lay pipes inside the house. There are many nuances:
- Water intake points should be located as compact as possible for optimal organization of the sewerage system.
- The toilet is connected to the riser separately from other devices to prevent them from sucking drains from the toilet.
- Drains from sinks, sinks, showers and other plumbing equipment should be supplied to the common riser higher than the drain from the toilet.
- The slope of the pipes should be 2-9 °.
- Every four meters of the riser, revisions should be installed at a height of more than 1 m from the floor.
- If the sewer pipes are not hidden under the floor, then revisions must be installed before each turn.
- The riser is equipped with a ventilation pipe with its outlet above the level of the roof from 70 cm. This will protect the house from unpleasant odors.
- In unheated rooms, the pipeline must be insulated.
- Parts of the pipeline at the joints are coated with sealant.
- To organize drains from sinks and sinks, a pipe with a diameter of 50 mm is sufficient, from a toilet, bath and shower - 110 mm.
- The diameter of the riser must be at least 110 mm.
- The smaller the pipe diameter, the greater its slope should be.

Connection diagram of a riser with an external sewage pipe
It is advisable to soundproof the sewer pipes (this will increase the level of comfort of housing) by arranging a plasterboard box and filling it with mineral wool.
If the sewage system is chosen under the floor in a private house, then additional conditions according to SNiP must be observed. In addition to the fact that with such an installation, the height of the room is lost, it is not always possible to install an underground sewage system. It is forbidden to install it:
- in premises for storing food;
- in living rooms (bedrooms, guest rooms or children's rooms);
- in rooms for long-term stay of people (offices, study rooms);
- in rooms with installed electrical equipment.
Important! The configuration of the underground sewage system should be as simple as possible, without unnecessary turns, transitions and fittings.
During installation drainage system under the overlap, a number of rules must be observed:
- The diameter of the pipes should not be more than 110 mm.
- Fittings are mounted at a 45 ° angle.
- The fasteners are installed at a distance from each other equal to the pipe diameter multiplied by 10.
- The presence of underground wiring in the bathroom should not create an excess of the floor over the rest of the premises.
- Increased requirements are imposed on the quality of the materials used, since to repair the laid network, it will be necessary to break the overlap.
Do-it-yourself installation of internal wiring of sewage pipes in a private house is a rather simple task, but it requires care and a serious attitude to the details that distinguish high-quality repairs.
